
Syncing your Nextcloud calendar and contacts with iPhone/iOS
Your iPhone and iPad can work directly with the calendar and contacts in your WebOké Nextcloud. You don't need an extra app: in the settings, you add a CalDAV account for your calendars and a CardDAV account for your contacts. After that, you'll see everything in the regular Calendar and Contacts apps.
Important: your regular password won't work here. Your Nextcloud asks for an extra code when you log in, and the iPhone can't enter it. That's why you use an app password instead. You can read how to create one below.
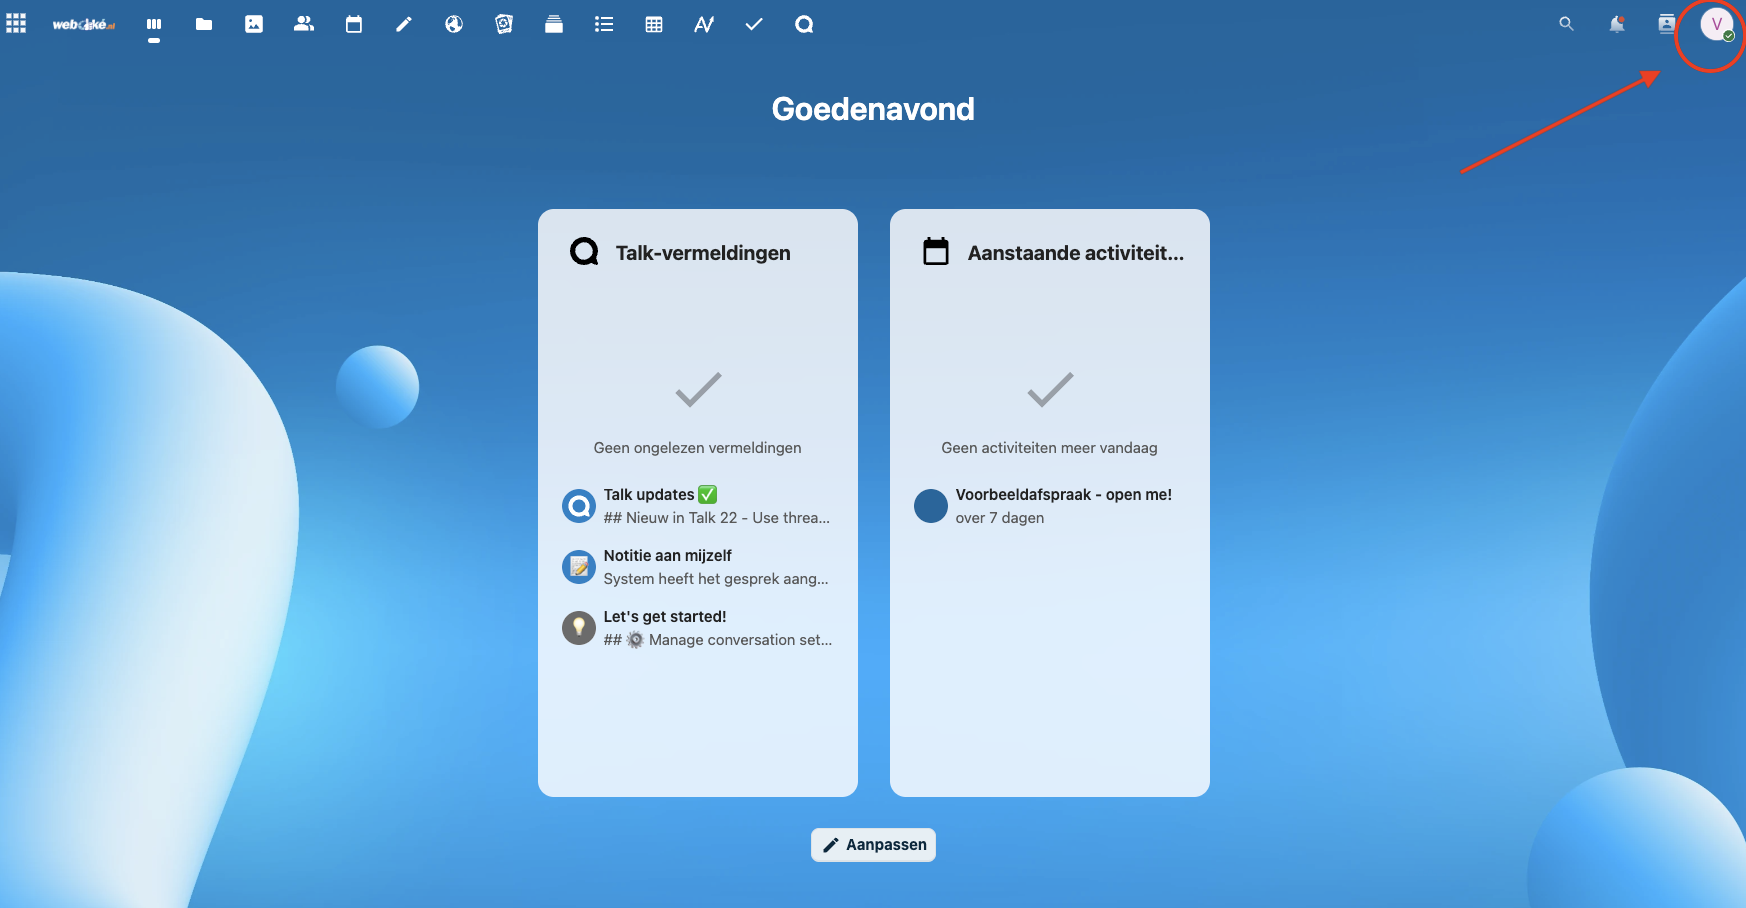
Step 1 - On your computer, log in to your Nextcloud and click your profile picture in the top right. In the menu, click Settings.
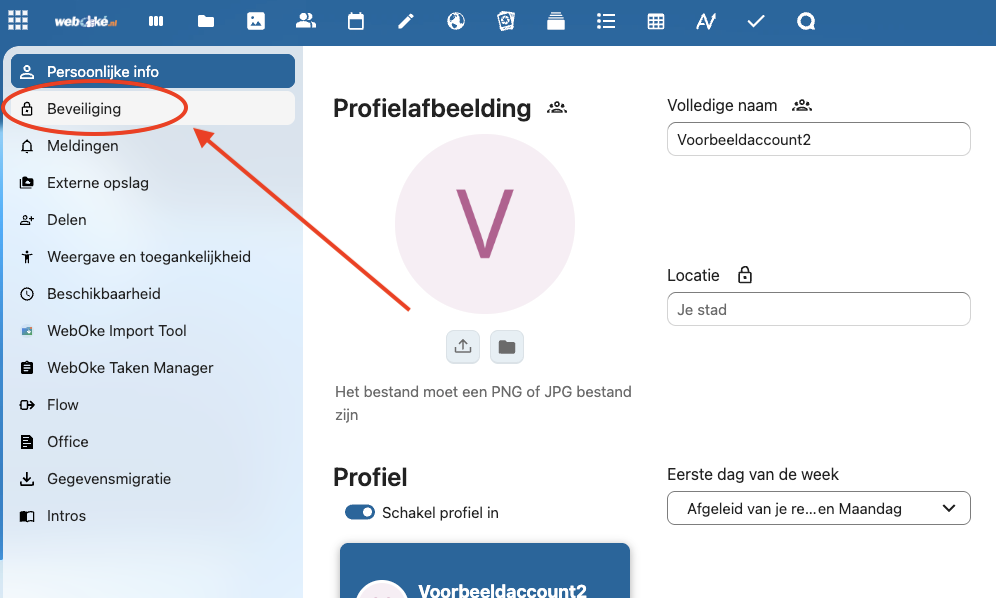
Step 2 - On the left, click Security.
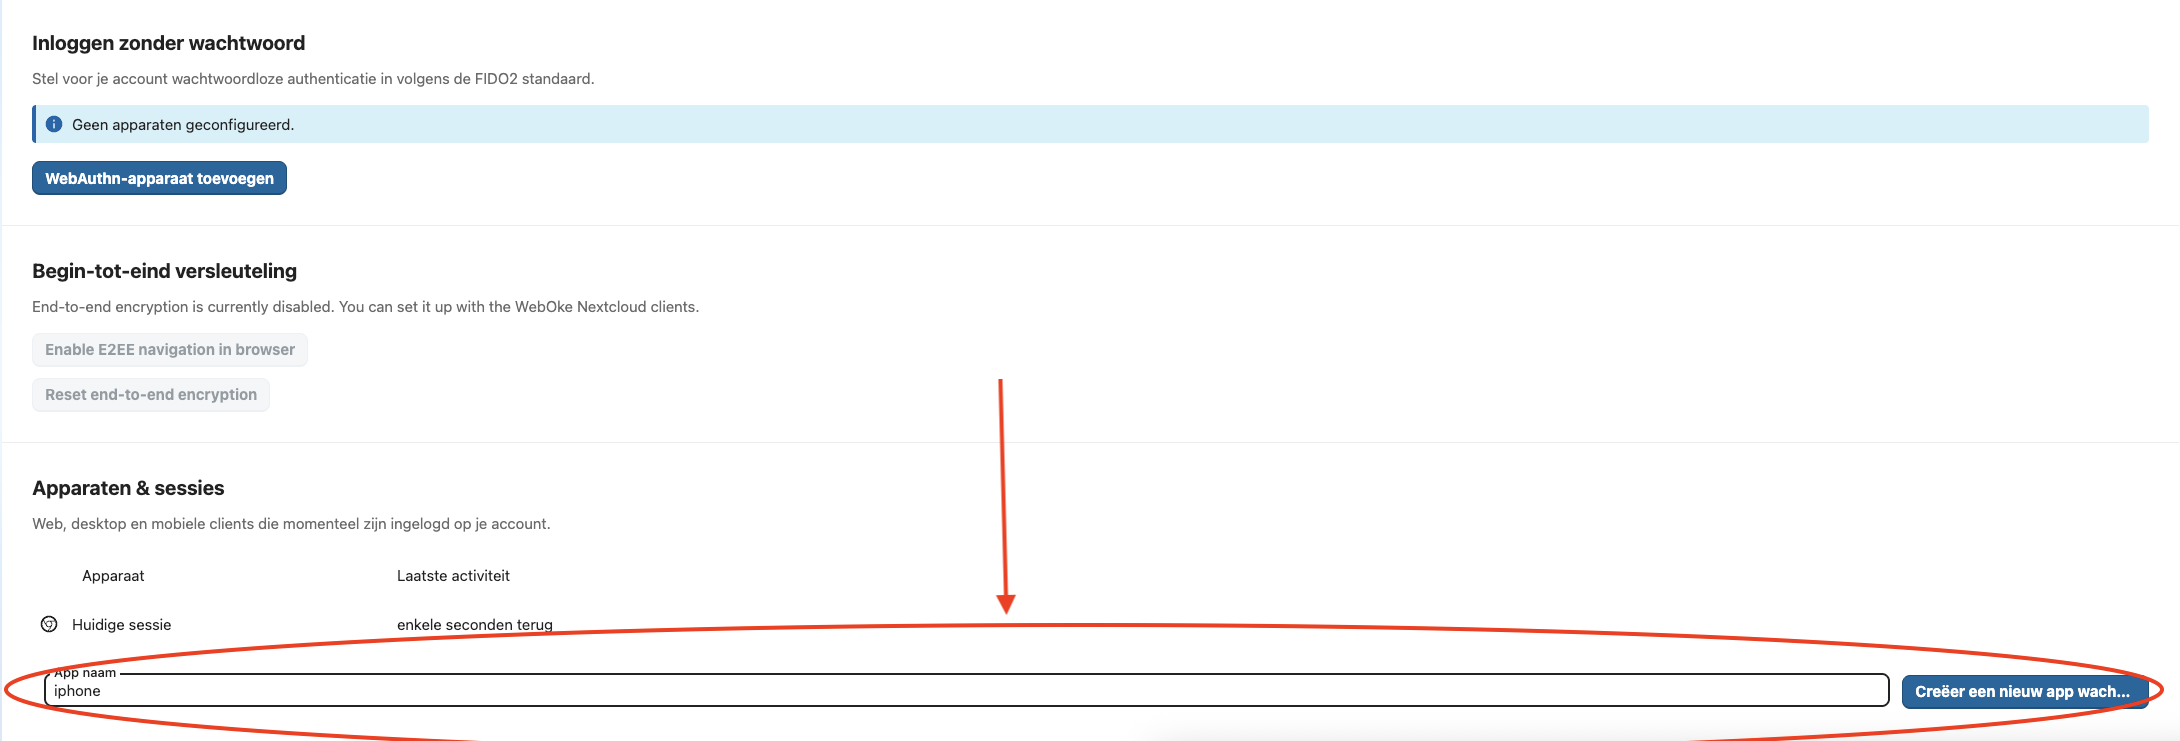
Step 3 - Scroll to Devices & sessions and enter a recognizable name, for example 'iPhone calendar'. Click Create new app password.
Step 4 - If your Nextcloud asks for your regular password again, enter it. You'll now see your Login (your username) and a long Password. Keep this window open: the password is only shown once.
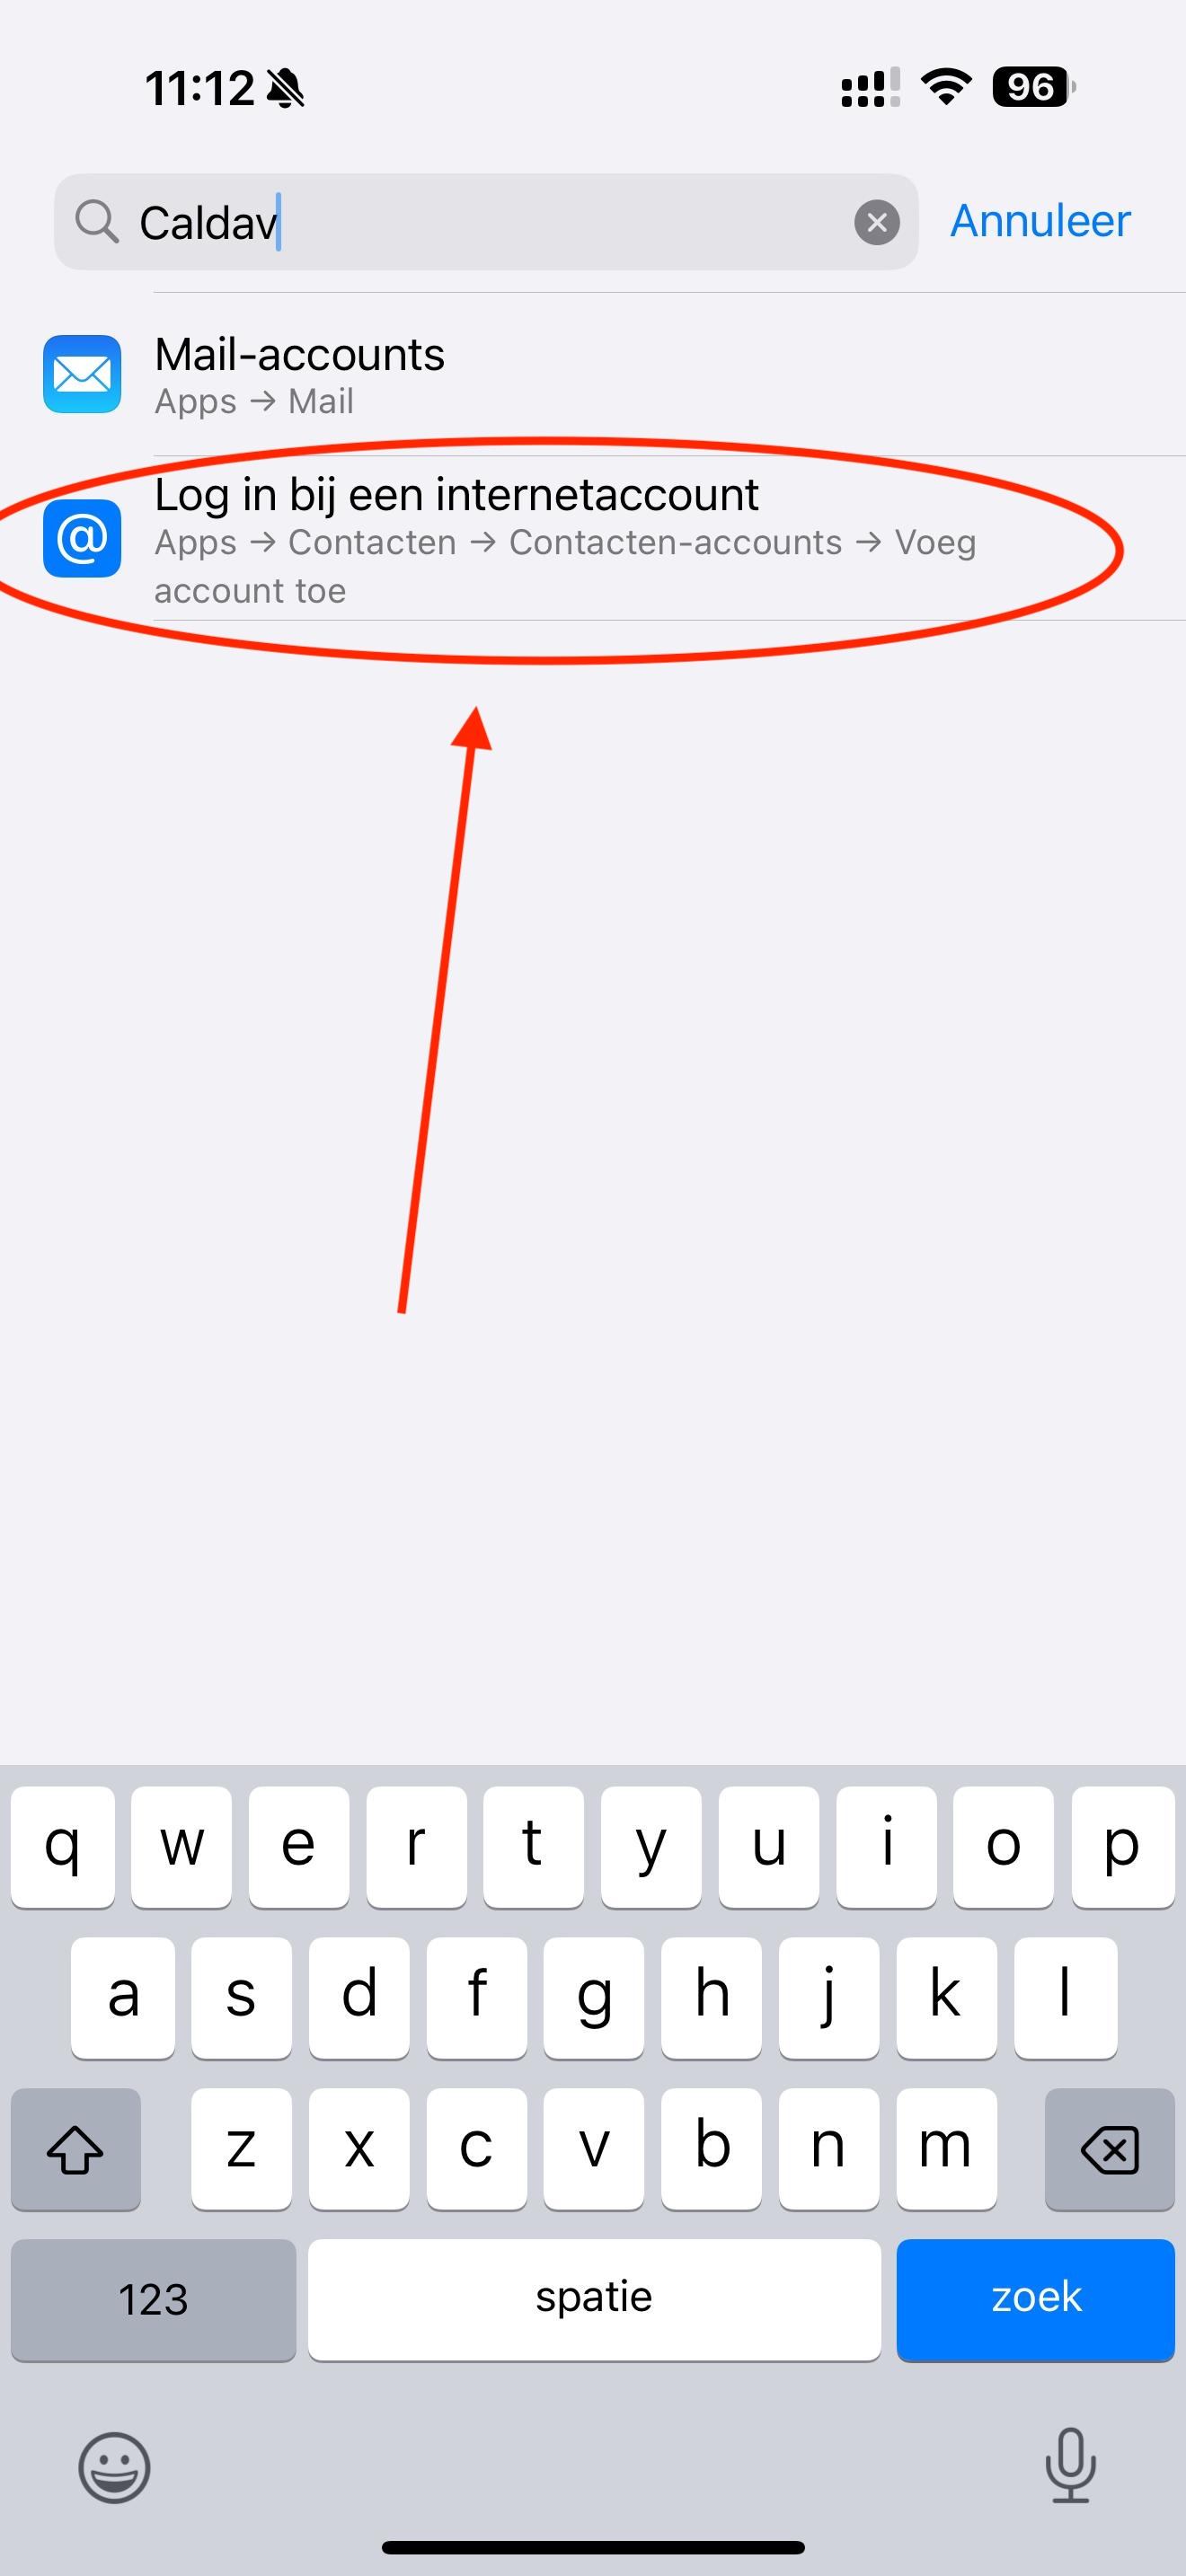
Step 5 - On your iPhone, open the Settings app. From iOS 18 onwards, tap Apps, Calendar, Calendar Accounts. On an older iOS version, tap Calendar and then Accounts.
Step 6 - Tap Add Account and choose Other at the bottom.
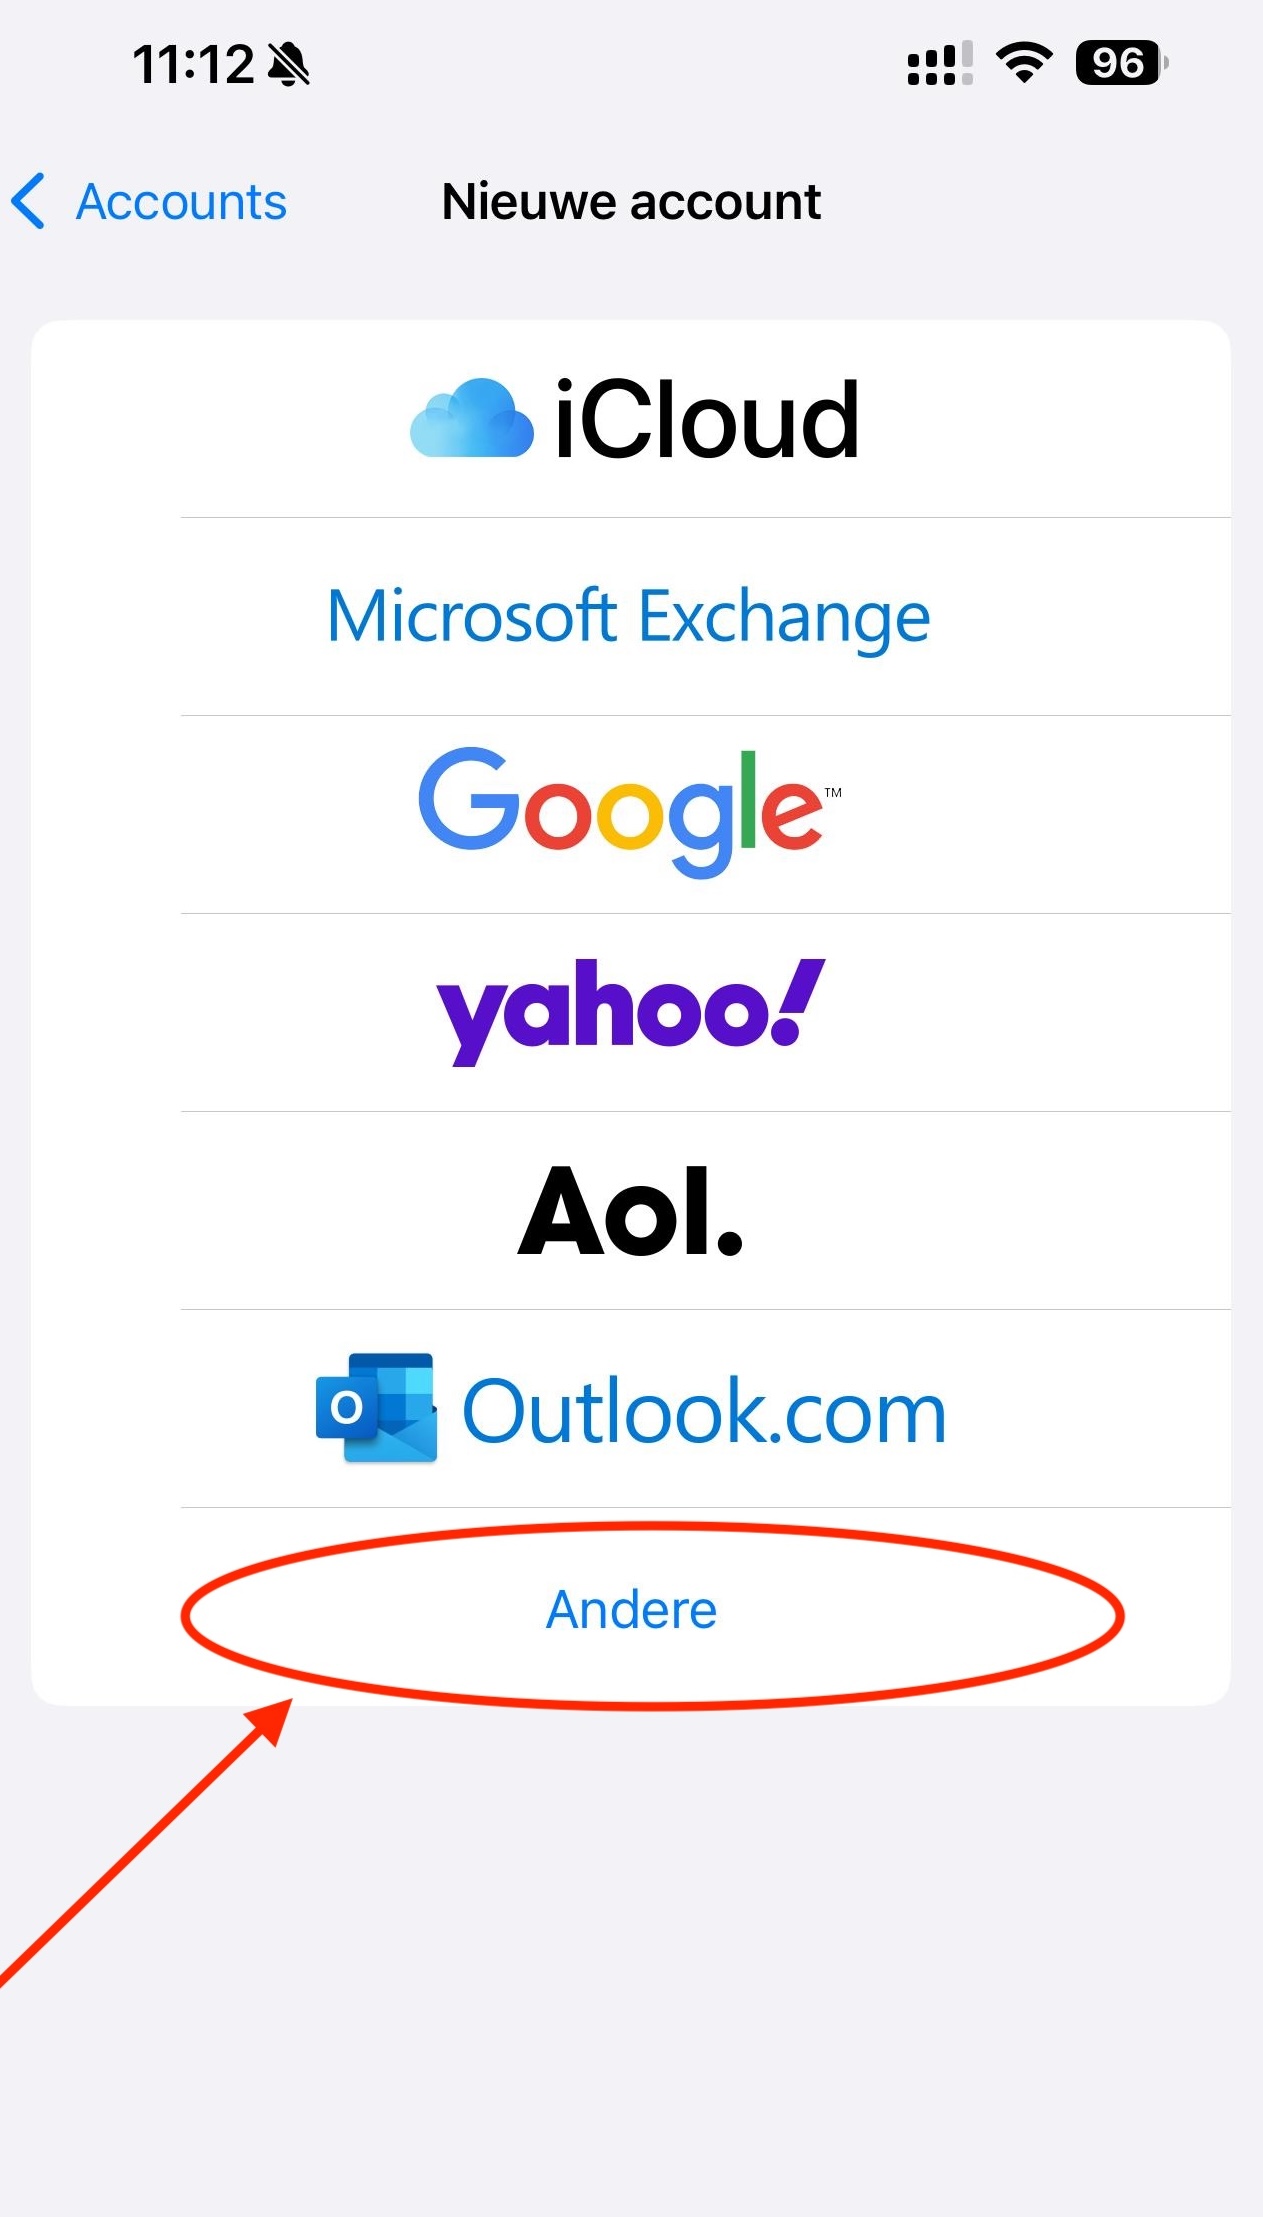
Step 7 - Tap Add CalDAV Account for your calendars. For your contacts, you'll do the same later via Apps, Contacts, Contacts Accounts and Add CardDAV Account.
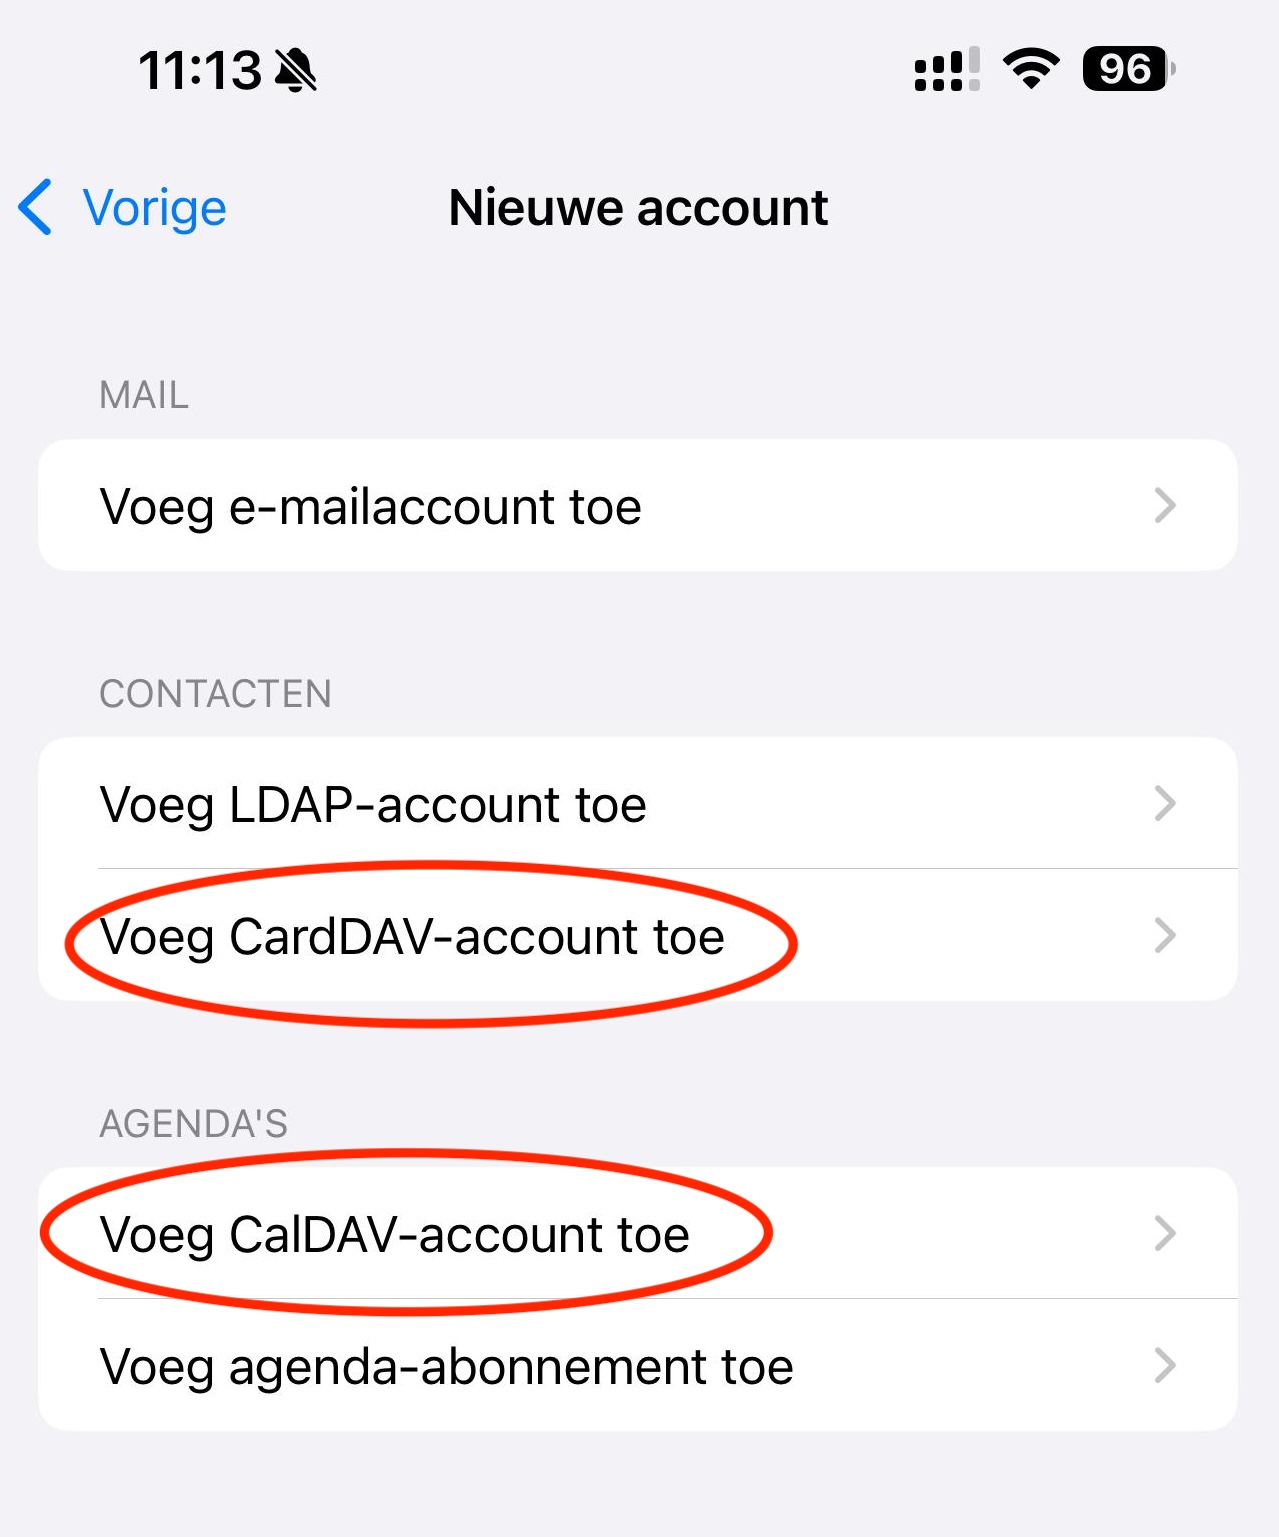
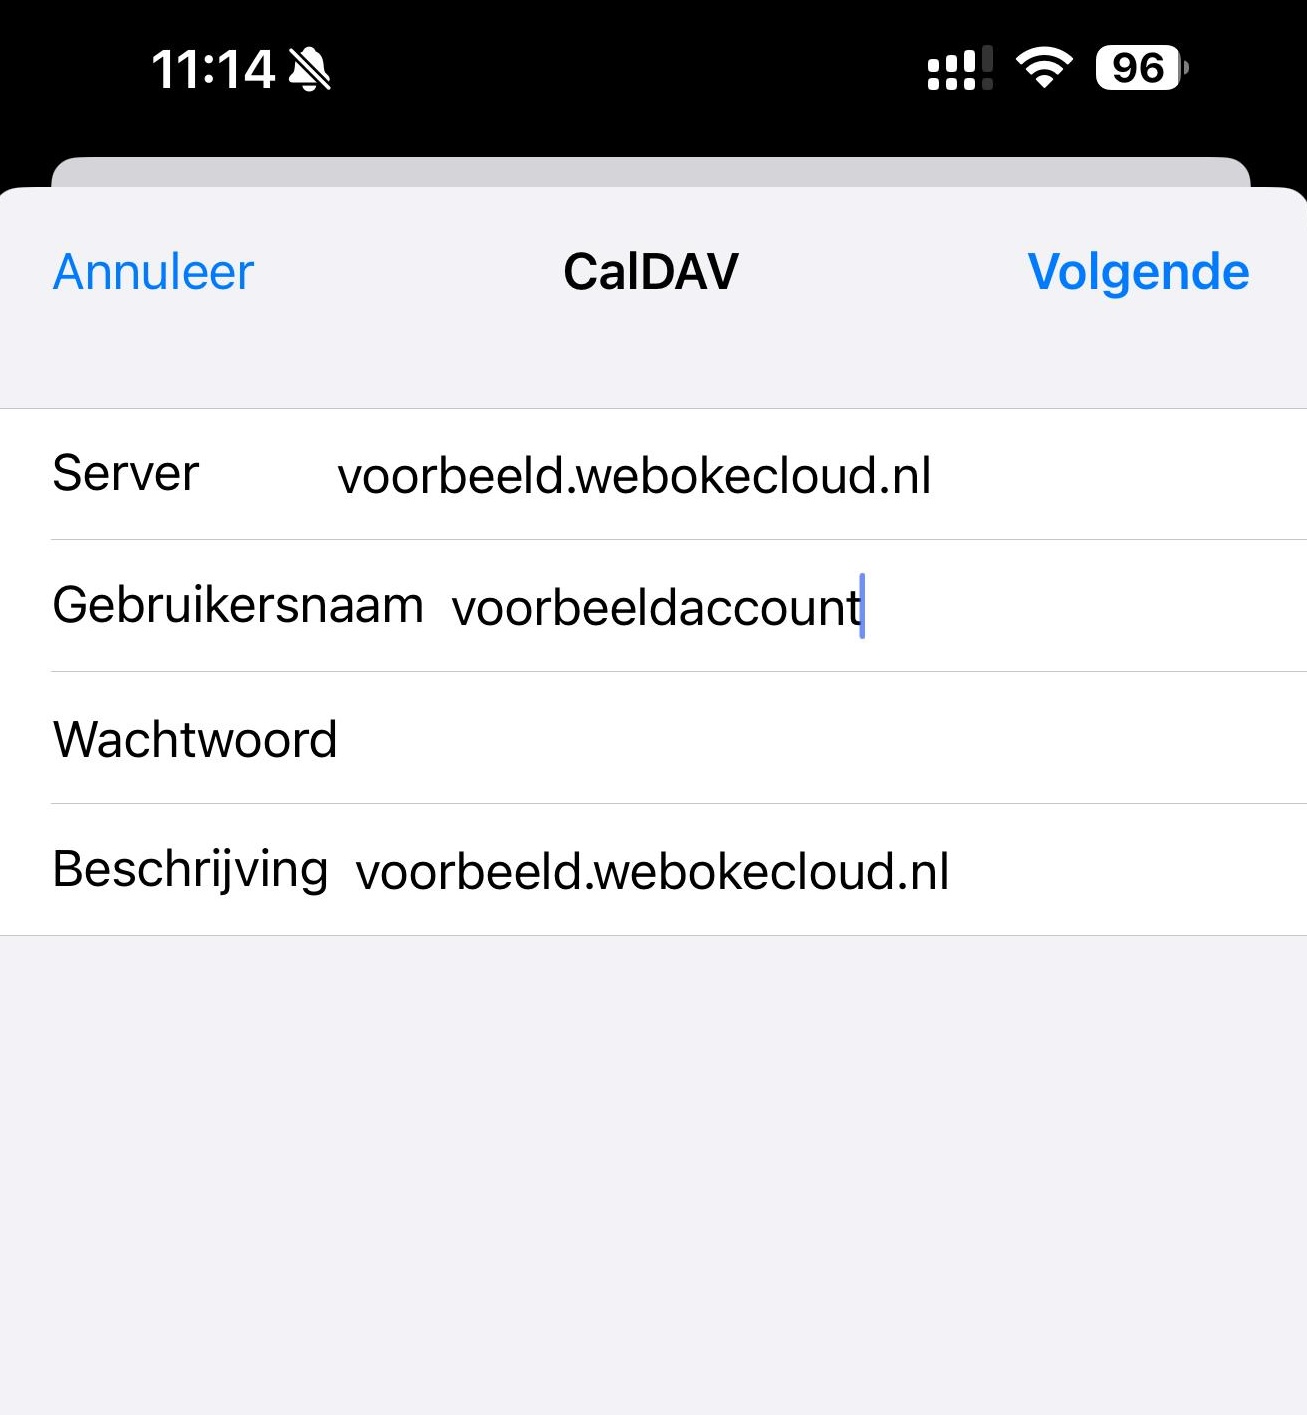
Step 8 - Fill in the fields:
Server - The address of your Nextcloud, for example jouwnaam.webokecloud.nl.
User Name - Your Nextcloud username. You can also find it in the app password window.
Password - The app password from step 4.
Tip: do you have a Mac with the same Apple Account? Copy the password on your Mac and paste it straight into your iPhone.
Description - The iPhone fills this in automatically. You can change it to WebOké Nextcloud, for example.
Then tap Next.
Does your iPhone say it can't verify the account? Then enter the full address under Server: https://jouwnaam.webokecloud.nl/remote.php/dav/principals/users/gebruikersnaam/. You can also copy that address in your Nextcloud: open Calendar, click Calendar settings in the bottom left and, under CalDAV, copy the Server address for iOS and macOS.
Step 9 - Turn on Calendars, and also Reminders if you want to see your tasks. Tap Save.
Step 10 - Done! Your calendars and contacts are now in the regular apps on your iPhone. Anything you add there will also appear right away in your Nextcloud and on your other devices. You can use the same app password for calendar and contacts on the same device.
You can read more about app passwords in Creating an app password.
Detailed explanation with screenshots: Calendar and contacts on the iPhone and iPad and Calendar or contacts not showing up on the phone in the Nextcloud manual.