
Installing Nextcloud Files on an Apple Mac
With the Nextcloud Files app, you can see all the files from your WebOké Nextcloud right in the Finder on your Mac. Anything you put or drag into the Nextcloud folder goes to your Nextcloud automatically.
On the Mac, the app uses Apple's File Provider, the same technology that iCloud Drive and OneDrive use. You see all your files, but a file is only downloaded when you open it. That way, 80 GB in your Nextcloud doesn't take up 80 GB on your Mac as well.
You can set this up in a few steps, which we explain below:
Step 1 - Go to www.weboke.nl/en/download and click macOS under Nextcloud Files. You need macOS 13 or newer.

Step 2 - Open the downloaded file (for example Nextcloud-35.0.0.pkg) and follow the steps of the installer. Your Mac will ask for your Mac password, not your Nextcloud password. Then open Nextcloud from the Applications folder.
Step 3 - In the app, click Log in.

Step 4 - Enter the address of your Nextcloud under Server address and click Log in.
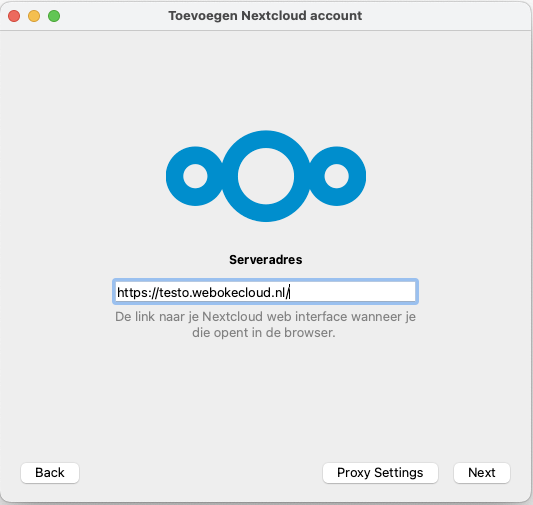
Step 5 - Your browser opens with Connect to your account. Click Log in. If you're not logged in yet, enter your username, password and the login code from your email or authenticator app.

Step 6 - Click Grant access. You don't need to create an app password: the app takes care of that itself.

Step 7 - Back in the app, File Provider is ready to go. Leave it switched on and click Connect. Does macOS ask for permission for an extension, a file provider or access to folders? Allow it, otherwise the app can't sync.
Step 8 - Done! Open the Finder. Your Nextcloud now appears on the left under Locations. Double-click a file and it will be downloaded and opened. Want to be able to open a folder without internet as well? Right-click it and choose Keep Downloaded so it always stays downloaded.

You'll now see the Nextcloud cloud icon at the top in your Mac's menu bar. Click it to view your activity and manage the settings.

Detailed explanation with screenshots: Installing Nextcloud Files on the Mac (File Provider) in the Nextcloud manual.